DIY Pixel Bars
Some tips, tricks, and product links to make your own pixel products!

DIY Pixel Bars
Recently, I posted on Instagram about some DIY pixel bars that the students of City Springs Conservatory and I made for a production of All Shook Up
Of course, there are plenty of name-brand solutions out there from City Theatrical and Environmental Lighting – for many of us, though, the cost of these items can be out of reach. Fortunately, there are many products available on Amazon that can create beautiful fixtures and effects. As with any generic purchase, I recommend that you get plenty of spares. One of the things you give up when going with the more budget option is some level of quality control.
That said, I’ve had exceptional results with the offerings from BTF-Lighting on Amazon, both in pixel tape and in regular LED tape.
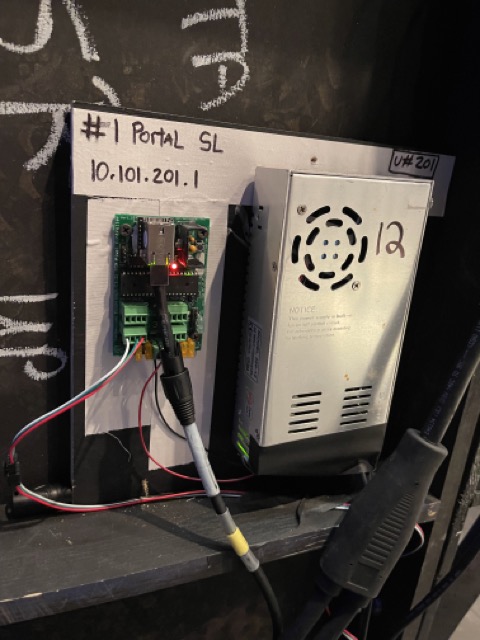
For controllers, I love the offerings from SanDevices.com – just over $100 for a 4-output controller that can handle a TON of pixels. The device can automatically split DMX universes for you, meaning you can patch more than 512 channels of control on single outputs, you don’t need separate cable for each universe. They can also be configured to output DMX on any of their ports, essentially turning them into a little affordable sACN gateway.
The tapes linked below are just some of the many options, but ones that I’ve personally used and can vouch for. The “3-pixel” tapes can be cut every 3 pixels, and the control is also segmented as such. The “Single Pixel” tape is just that, individual control of every individual pixel.
Pixel Tape
Accessories
Important Tips
- Be sure you’re using the correct voltage throughout your system. Common varieties are 5, 12, and 24V.
- Depending on how long of a run you are using (and the system voltage) you may need to re-inject power every so many feet. In my experience, 18′ of pixels on 12V has a considerable drop by the time you get to the end. For me, this was only noticeable if using open white at 100% – but I was able to overcome this by running no hotter than 60% when in white. Full in single colors. Your mileage may vary.
- Unlike regular LED tape, the direction/orientation of pixel tape matters. Data flows in the direction of the arrows printed on the tape.
If you don’t want (or don’t need multiple universes in one line) you can use these $25 dmx to pixel devices from Amazon. I’ve used these with good success both their standalone mode as well as with DMX control for my halloween pumpkin display.